Intro
Documents collaboration is one of the most powerful tools these days for research projects and gorups. This allow several people to review a file at the same time, recording the changes and identifying them by the user. This is the alternative to modify the document in your local computer and send it by e-mail to the other group members to modify, adding your initials at the end of the document tittle, which has been the traditional way of collaborate in documents until new collaborative tools appeared.
In this tutorial, the way of create and edit documents to make them available for collaboration in Synology will be explained.
Create the document to collaborate
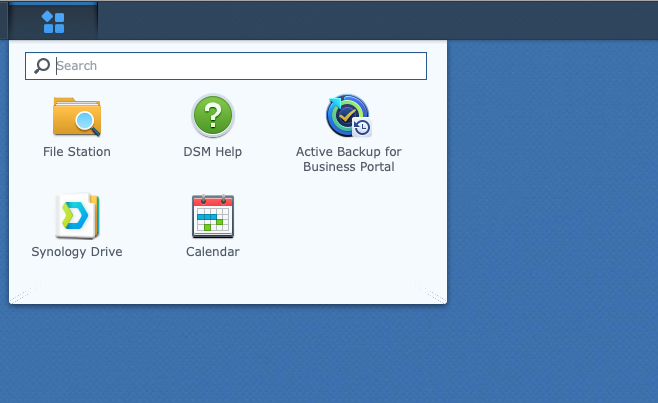
The tool we are going to use to collaborate is Drive. To access Drive you must login to the synology and click in the Drive icon that appears in Main Menu, which is in the upper left part of your synology screen (fig. 1).
After opening the Drive app, we must have a document to collaborate to. There are two ways of having it:
- Create a blank document
- Import an existing document from your local computer
Creating a blank document
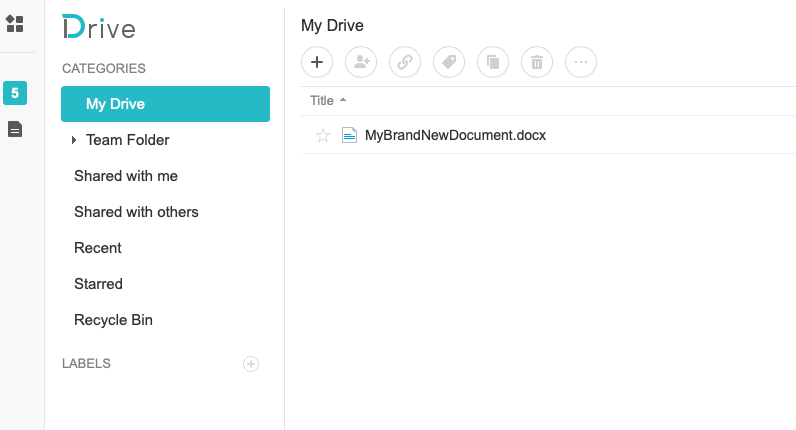
To create a blank document in Drive you have to chose the folder where to create it and once in that folder you need to click on the icon with the plus mark (+) to open the floating menu where you can choose what you want to add (fig. 2).
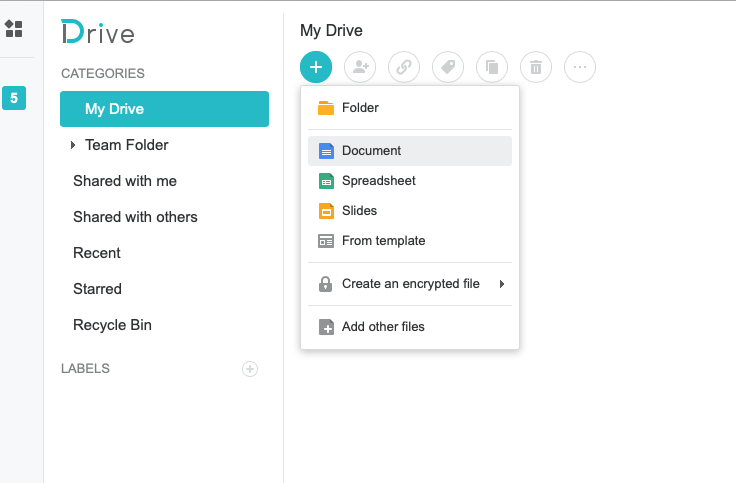
In fig. 2 we have chosen the «My Drive» folder to create a Document to collaborate. Once we click on «Document» a blank document will appear with a MS Word® like menu (fig. 3).
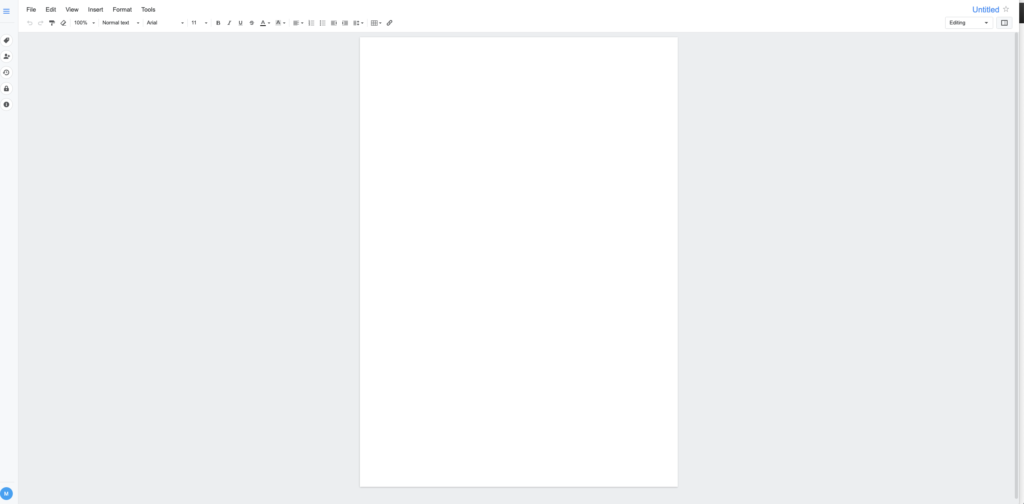
To create a title for the document we must go to the upper right part of the screen (fig. 4) and change Untitled by the tittle of our document.
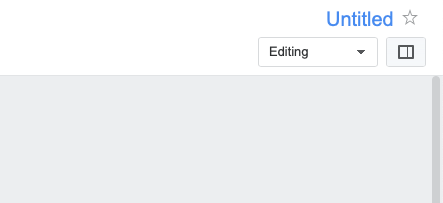
At the right of the tittle we can choose to add the document to our favorites clicking in the star.
Below the tittle there is a Select menu witth the following options: Editing, Viewing, Revising and Hide comments. As we are creating the document now, the Editing option is the one to choose (it is the default one).
When collaborating in an existent document, the Revising option is the one to choose in order to record all the additions/changes we want to add to the document.
Importing an existing document from your local computer
If we had the work done in advance and our document already existed, there is an easy way to share it. We only have to open the desired folder and drop it in the main window. When the document has been uploaded, it will appear in the list of the folder with an icon in white background (fig. 5)
This document cannot be edited using the server tools unless it is previously converted to a Synology Office file.
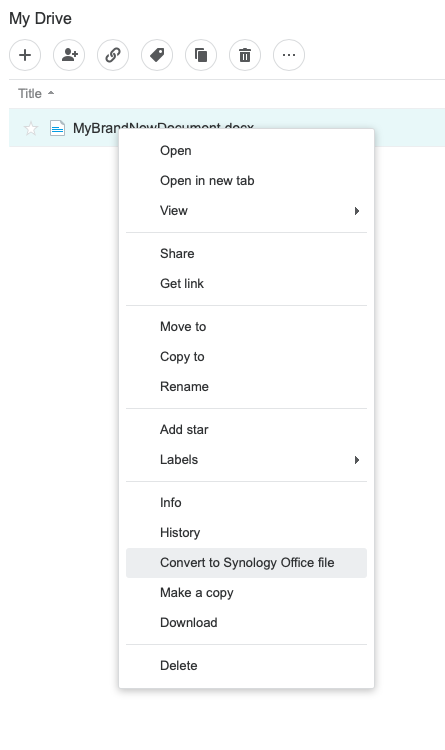
To convert the document we must click on it with the mouse right button so the file menu appears and choose Convert to Synology Office file (fig. 6)
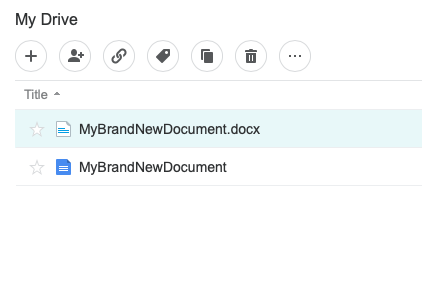
Once the system finishes the conversion, a new document with the same name, no extension and a dark background icon appears (fig. 7)
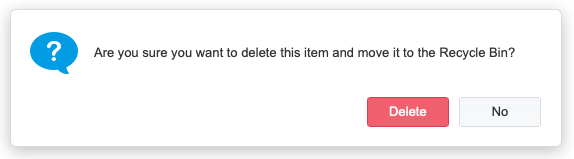
In order to avoid confusions, the best is to delete the original document from the server folder by clicking it with the mouse right button and selecting Delete from the file menu or clicking it with the mouse left button and selecting the trash icon in the upper part of the documents listing (the second on the right in fig. 7). A confirmation pop up will appear (fig. 8). When we click the Delete red button the file vanishes.
Now we have a brand new collaborative document. It is time to share it.
Sharing the document
To share our brand new document we must go to the left part of the screeen and click the second button from the top. The sharing form will then appear (fig. 9).
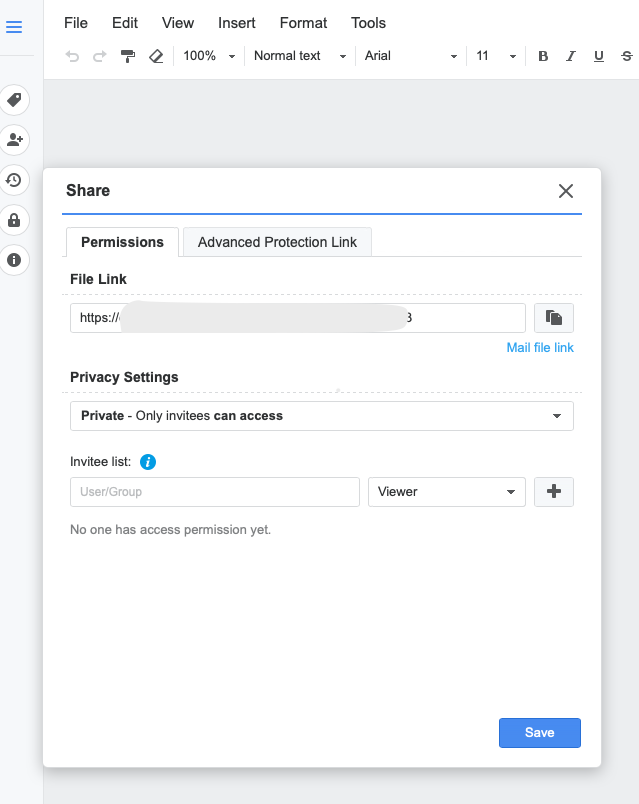
In the Permissions tab we can find the link to send to our collaborators (File Link). In the Privacy Settings section we can choose how to share the document. The default option (Private – Only invitees can access) means that only those synology users we invite are allowed to access the document.
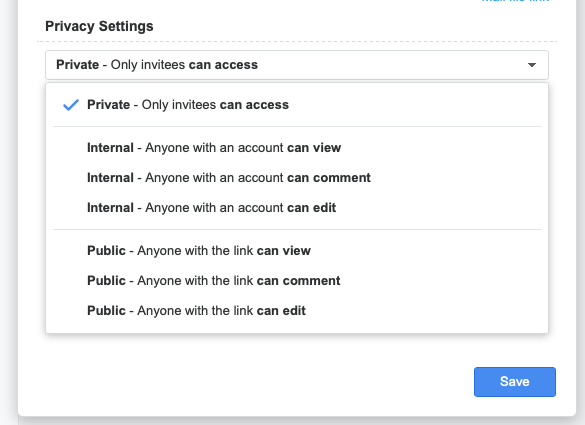
There are three kind of permissions:
- View. No edit, no comment allowed
- Comment. The user can add comments but cannot change the content of the document
- Edit. The user can comment and also edit the content of the document
These permissions can affect to three kind of users:
- Private. Means only those users the author invites can access the document. What the invited users are allowed to do in the document is determined by the role assigned in the invitee list section.
- Internal. Means the permissions affect to all the system users.
- Public. The permissions affect to all of those who have the link, independently that they are system users or not.
Imagine that we want to share the document with the people involved in WP6. Then we should choose Private in the Privacy Settings and the choose IS_MIRRI_WP6 group in the Invitee list. For that we only have to write wp and all the WPs will appear (fig. 11).
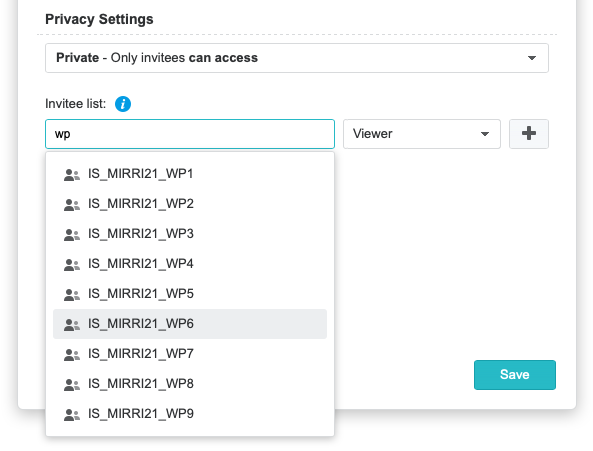
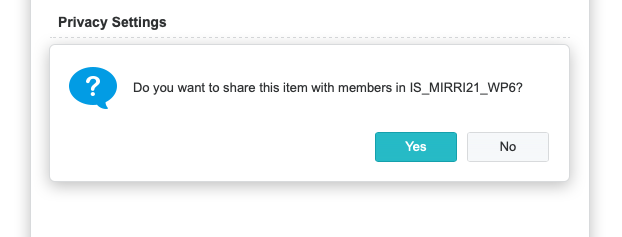
Once we have decided who we want to share the document with it is time to choose what permissions to give to the selected user/group. To the right of the Invitee list there is a select menu with the following options: Previewer, Reviewer, Viewer, Commenter, Editor, Manager. The Viewer is selected by default (fig. 11). The permissions of the different roles appear on mouse over the icon with the i in blue background at the right of the Invitee list (fig. 11). When the right role has been selected we must click Save and a confirmation pop up will appear (fig. 12). By clicking Yes the document will be finally shared with the selected user/group with the selected role.
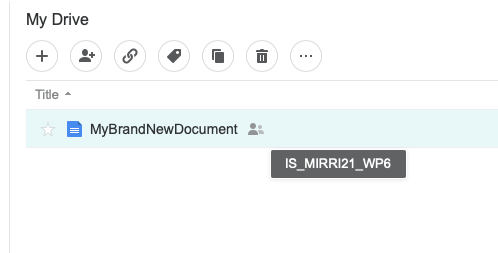
After accepting, a new icon appears to the right of the file name in the list. On mouse over this icon, the users/groups we have shared the file with will apear (fig. 13).
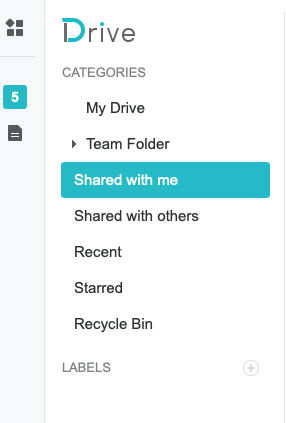
The file then will appear when clicking in the Shared with me item of the Drive menu in all the users/gorups we have shared it with (fig. 14)